Wednesday, February 27, 2013

KISS Nail Art

Today I have some nail art for you guys!  My hubby has been pestering me to do some KISS nail art for one of his co-workers for the past couple weeks.  Apparently he is a huge KISS fan.  They are a bit before my time, but I have seen a few episodes of "Gene Simons Family Jewels" and I enjoyed it.


So I started off by painting my nails a with a black polish, then I added some fast drying top coat.


Then using a red, orange and yellow acrylic paint I mixed my colours to create a fiery background on my black nails.


I mixed red with orange and orange with yellow so I could create a ombré effect with the flames.


I started with the red paint and created the shape of the flames.  Then I used too the red-orange shade and painted it over the red. Then I took the orange and painted in on top of that, and so on, until I got to the lightest shade, creating and ombré look with the flames.


Then using my black acrylic paint I painted KISS across my four fingers, then I outlined it with a thin black line all the way around the letters.


I also wanted to see how it would look with a matte top coat.


So after doing the KISS logo I also wanted to try some cute kiss faces. Here's how they turned out.  Aren't they adorable!!


Which do you prefer? The KISS logo or the faces? Let me know in the comments below!!
-Melissa xoxo

Monday, February 25, 2013

Bow Tutorial

So today I'm trying to catch up on the nail art challenge I committed to at the beginning of February. I've been having what I call a "nail art brain fart", I just haven't been inspired lately. Plus I broke a couple of nails and had to file them down, which is never fun. So, the first day I need to catch up on is day 17 "Bows". I was asked a while back on my Facebook page to do a bow tutorial, so I figured there's no better time then now!!

For these nails I used a nude polish, a fast drying top coat, three different colours of acrylic paint and a small detail paint brush.   I got the paint and paint brush at Michael's Craft Store.


So to start I painted my nails a nude shade, for this look I chose my new OPI polish in "My Vampire Is Buff", then I added a layer of Seche Vite fast drying top coat to smooth out the surface I was painting on and to dry the polish. Then once the top coat was dry I used acrylic paint and painted on two heart shapes that mirrored each other using the outline colour which in this case was black.


Next while I was waiting for the black acrylic paint to dry I took my bow colour, in this case it was pink, and I mixed it with white to create three different shades of pink.


Then I took the darkest shade of pink and filled in my bow. You want to bring the paint as close to the black as possible without covering it completely. This creates a nice thin outline. I also left a little line of black in the middle of the heart shape to create what looked like a crease in the bow.


Then I took the black paint again and painted a circle in the middle of the two heart shapes to create the center of the bow. I overlapped the black over the heart shapes just slightly.


Then I took the darkest pink and filled in the circle. Then taking the black I added two think lines coming down from the bow.


Then I took the darkest pink and filled it in. Then I went in with my medium shade of pink and layered it over the dark pink to create a shaded effect. Then I went in with the lightest pink and added it just where I wanted it to look highlighted. So on the top of the bow and right in the center of the bow. The I took the pink paint (with no white mixed in, straight from the bottle) and added it where I wanted it to look the darkest or where I wanted it to look like there was a shadow.


Lastly I waited for the acrylic paint to dry completely and then I added a good thick coat of Seche Vite fast drying top coat.


That's it you're done! Did you like this tutorial? Let me know in the comments below!
    -Melissa xoxo

Tuesday, February 19, 2013

China Glaze Avant Garden Collection Part 2 "Blooming Brights"

Today I have the second part of the new China Glaze Avant Garden collecting. This portion of the collection is the darker shades and is playfully named "Blooming Brights". Also like the first part of this collection, the polishes have very clever names. There are three shimmers and three cremes but unlike the pastel portion of this collection the shimmer shades are easier to apply and aren't streaky.

First up is a pinkie peach polish with a subtle golden shimmer called "Mimosa's Before Manis". This colour is absolutely perfect for summer! It reminds me of a polish I would pair with a nice tan! The formula was awesome! After using the shimmer polishes in "Pastel Petals" portion of this collection, I was expecting these shimmers to be hard to work with too. I was pleasantly surprised to find that I was wrong, the application was easy and it was opaque in just two coats!

 Mimosa's Before Manis


Next up I have "Snap My Dragon", which looks as feisty as the name suggests! This is an eye catching shade of red that leans just slightly pink and has a subtle pinkie red shimmer to it. This polish is perfect for a date on a hot summer night! The formula again was great, I used two coats for the pictures below, but I wish I had put some topcoat on top of this polish when i swatched it because it would have looked better.

Snap My Dragon

This is the last of the shimmer shades of this collection, and it's probably my personal favourite of the bunch. "Fancy Pants" is a medium purple shade with a gorgeous pink-purple shimmer. It was almost impossible to capture the shimmer in a photo! It took two coats to full opacity and looked better with a layer of top coat.

Fancy Pants

Next I have "Passion For Petals". It's a salmon pink creme, this polish didn't really stand out to me, but because I have some similar shades, it should be great for a gradient manicure. The formula was great and it was opaque in two coats.

Passion For Petals

This funny shade is called "Budding Romance". It does not inspire "romance" when I look at it that's for sure. That being said, I don't dislike this polish, I'm actually quite fond of it. It's different from the rest of the polishes in this collection not only because of the colour, but because of the consistency too. It's the only jelly polish of the bunch and therefore it was a fun surprise. Because it's a jelly polish it took three coats to complete opacity, but the coats went on nice and smooth with no streaking.

Budding Romance

Lastly, I have "Sunday Funday", what a fun name! I wasn't as excited about the polish as I was about the name though. The polish is fine, but it's just nothing special. It's a sky blue creme that I'm sure will come in handy for gradients because I have quite a few similar polishes to this one. Other than that the formula is great, and it was again, opaque in two coats.  Also, I don't know why but whenever I'm taking a photo of a bright blue polish my camera makes my skin look red-orange!  This is so frustrating!!  If you know how to correct this problem please let me know in the comment section!

 Sunday Funday

What do you think of this second part of the new China Glaze spring/summer 2013 collection? Do you prefer the "Pastel Petals" colours or the "Blooming Brights" colours? Let me know in the comments below!!
   
      -Melissa xoxo

Sunday, February 17, 2013

China Glaze Avant Garden Collection Part 1 "Pastel Petals"

Today I have half of the new China Glaze spring 2013 Avant Garden collection. This collection is split into two six piece collections, "Pastel Petals" and "Budding Brights". The collection featured in todays post is "Pastel Petals" which are the lighter of the twelve shades. There are three shimmery shades and three creme shades.

First up is "Dandy Lyin' Around". This is a shimmery white shade, the formula wasn't the best, it was on the thicker side which made it harder to apply. It was streaky and hard to get even coverage. This polish took three coats to get it opaque and it needed a good layer of topcoat to even it all out. This polish wasn't one of my favourites, but the finished result is very pretty.

Dandy Lyin' Around

Next is this stunning mint green shimmer called "Keep Calm, Paint On", have I mentioned that the names in this collection are super cute! This polish, like the first was streaky and took three coats to be completely opaque. Again I topped it off with a good layer of top coat to even it all out. I really love this colour, and the shimmer gives it that extra touch of something special.

Keep Calm, Paint On

The last shimmer in this portion of the collection is "Pink-ie Promise". Just like the previous shimmers in this collection it took three coats to full opacity and a generous amount of top coat. The shimmer in this polish is more much more subtle then the other two and was hard to capture in a photo. I love this light dusty rose shade.

 Pink-ie Promise


This pretty light blue-purple creme shade is called "Fade Into Hue". It instantly reminded me of a China Glaze polish I already have in my collection called "Secret Peri-Wink-Le". They are very similar but this one is just slightly lighter than "Secret Peri-Wink-Le" in my opinion you don't need both (unless you're a crazy polish hoarder like me). The formula is nice, it's opaque in two coats, and like most creme polishes, looks it's best with a good layer of topcoat.

Fade Into Hue

"Fade Into Hue" next to "Secret Peri-Wink-Le" in natural light.

Next is a lavender creme called "Tart-y For The Party", another adorable name! I'm a sucker for purple polishes so I really loved this one. The formula was easy to work with and it was opaque in two coats.

 Tart-y For The Party


Last but certainly not least is "Life Is Rosy". I was most excited for this shade because I've been looking for a good dark dusty rose colour to add to my collection. It did not disappoint! It's my personal favourite of the six and again it was easy to apply and opaque in two coats.

 Life Is Rosy


What do you think of these six pastel polishes? Let me know in the comments below!
     -Melissa xoxo

Wednesday, February 13, 2013

OPI Euro Centrale Collection

In honour of my first EVER blog post, I have the entire OPI Euro Centrale spring/summer 2013 collection for you all!  I've never purchased an entire OPI collection before, mainly because they are expensive where I live, but I have recently discovered a local beauty supply store that sells them for about half of what I would normally have to pay.  So of course I had to have them all!

First up I have "Hands Off My Kielbasa!".  It's very almost like a darker version of "A Butterfly Moment" from the recent Mariah Carey collection. It is a nude pink colour with a strong bronze shimmer.

Hands Off My Kielbasa!
Get your own... this bronzy tan is all mine!

Next is "Suzi's Hungary AGAIN!".  It's a medium toned pink cream and reminds me of spring.

Suzi's Hungary AGAIN!
 Thank goodness there are zero calories in this warm and yummy pink!

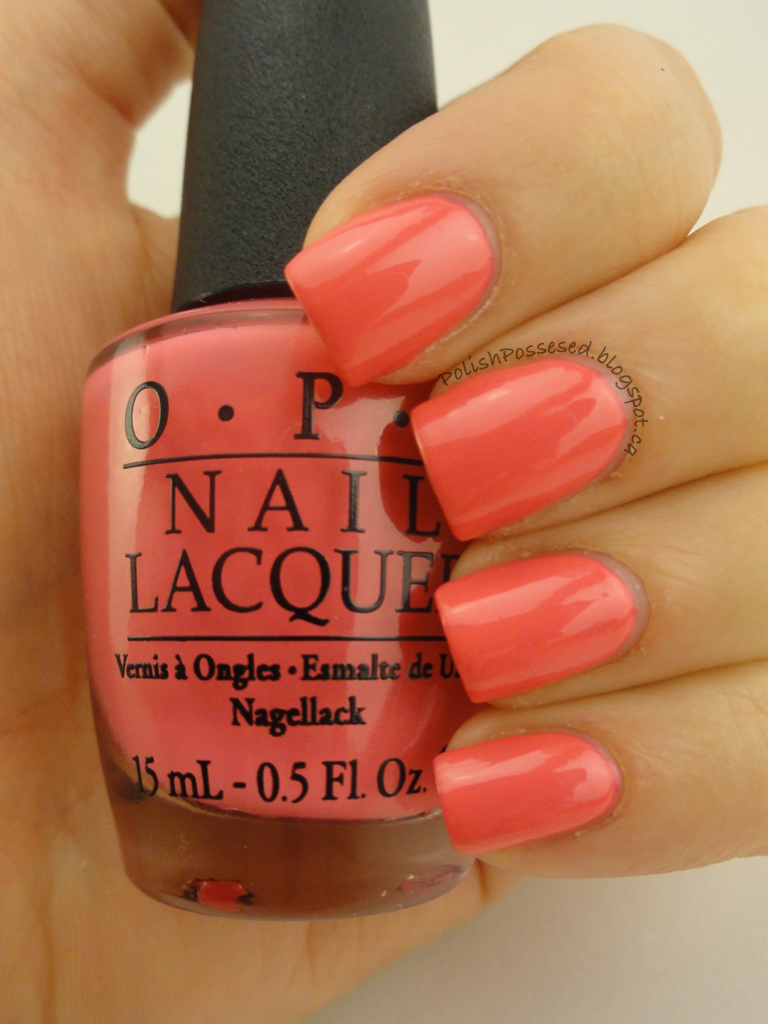
"My Paprika Is Hotter Than Yours!" is an amazingly bright red toned orange.  My husband says it reminds him of the orange car from Dukes of Hazard.  I don't know about that, but I do know that this shade is a head turner!

My Paprika Is Hotter Than Yours!
Get the extinguisher... this fiery red is sizzling!

"My Vampire Is Buff" is one of my favourites from this collection.  It is beautifully creamy looking on the nail, and application is a dream.  I had no problems with streaking or patchiness with this polish.

My Vampire Is Buff
Creamy, pale nude... just how I like my vampires.

"A Woman's Prague-ative" is a stunning Orange coppery micro glitter.  It has great coverage and was opaque in just two coats!

A Woman's Prague-ative
 I'm changing this shimmery copper for... never mind!

"Oy-Another Polish Joke!" is a yellowy golden micro glitter.  It's very similar to "A Woman's Prague-ative" in every was except colour.

Oy-Another Polish Joke!
So this shimmery-gold walks into a bar...

"Vant To Bite My Neck?" is my favourite of the whole collection!  It's a very deep eggplant purple.  I was surprised at how much I loved this polish on because its not a colour I'd usually be drawn too, but I'm so glad I own this shade!  Application and coverage is a dream.

Vant To Bite My Neck?
You know you want to... wear this deep eggplant.

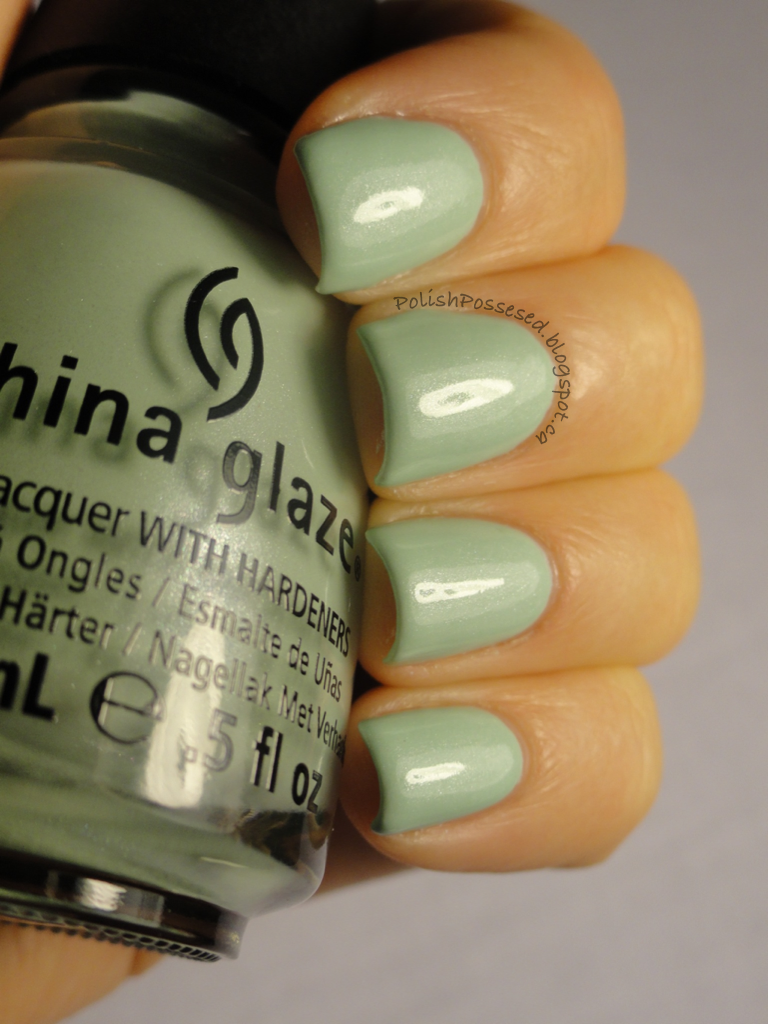
"Can't Find My Czechbook" is a beautiful creamy aqua blue.  It's another shade that reminds me of spring time.

Can't Find My Czechbook
I hope you take credit, because I must have this aqua!

"You're Such A BudaPest" is a light lavender shade.  I was surprised by this polish because I didn't notice that it had a slight purple-blue shimmer to it until I went to go paint it on.  The shimmer was very hard to capture in a photo. 

You're Such A BudaPest
If I let you borrow this periwinkle-purple, will you go away?

"I Saw... U Saw... We Saw... Warsaw" is another one of my favourites of this collection.  This creamy midnight blue is stunning on the nail.  It's application is a dream come true and you can get away with only one coat!

I Saw... U Saw... We Saw... Warsaw
Be seen in this deep midnight blue.

"OPI...Eurso Euro" is a funky colour thats kind of hard to describe.  It is a deep blue cream colour that kind of leans just slightly purple.  I had a hard time capturing this colour in a photo.

OPI...Eurso Euro
This deep blue cream is very continental.

Last but not least is "Polka.com".  It's Pink, blue and purple hex glitter with purple micro glitter mixed in.  It applies nicely and I didn't have a problem with it getting chunky.  My favourite thing about this polish is the name, it's just so clever!

Polka.com over You're Such a BudaPest
Blue and violet are dancing partners in this glittery combo.
Polka.com over Can't Find My Czechbook

What do you think of this collection?  What are your favourites?  Let me know what you think in the comments below!!
      -Melissa xoxo